真的吐了
k12media 閱卷系統的成績報表有學生試卷原圖,有下載,但要一個一個點擊,煩。於是想自動爬下來。結果吐了。
這套系統基本上是「2008–2012 年 Java Web 技術堆疊」,為了一勞永逸,硬生生填了一整套舊體系跟現代腳本世界之間的坑;我去找找二十多年前的塑料袋⋯⋯
之所以痛罵所謂教育信息化,原因之一就是這種服務應試的所謂信息化,骨子裏,這些玩意兒之所以是純垃圾⋯⋯就是因為完全不是用來幫學生學習的。
下載圖片也是想補充到 NotebookLM ,但實際測試學生的考試報告:
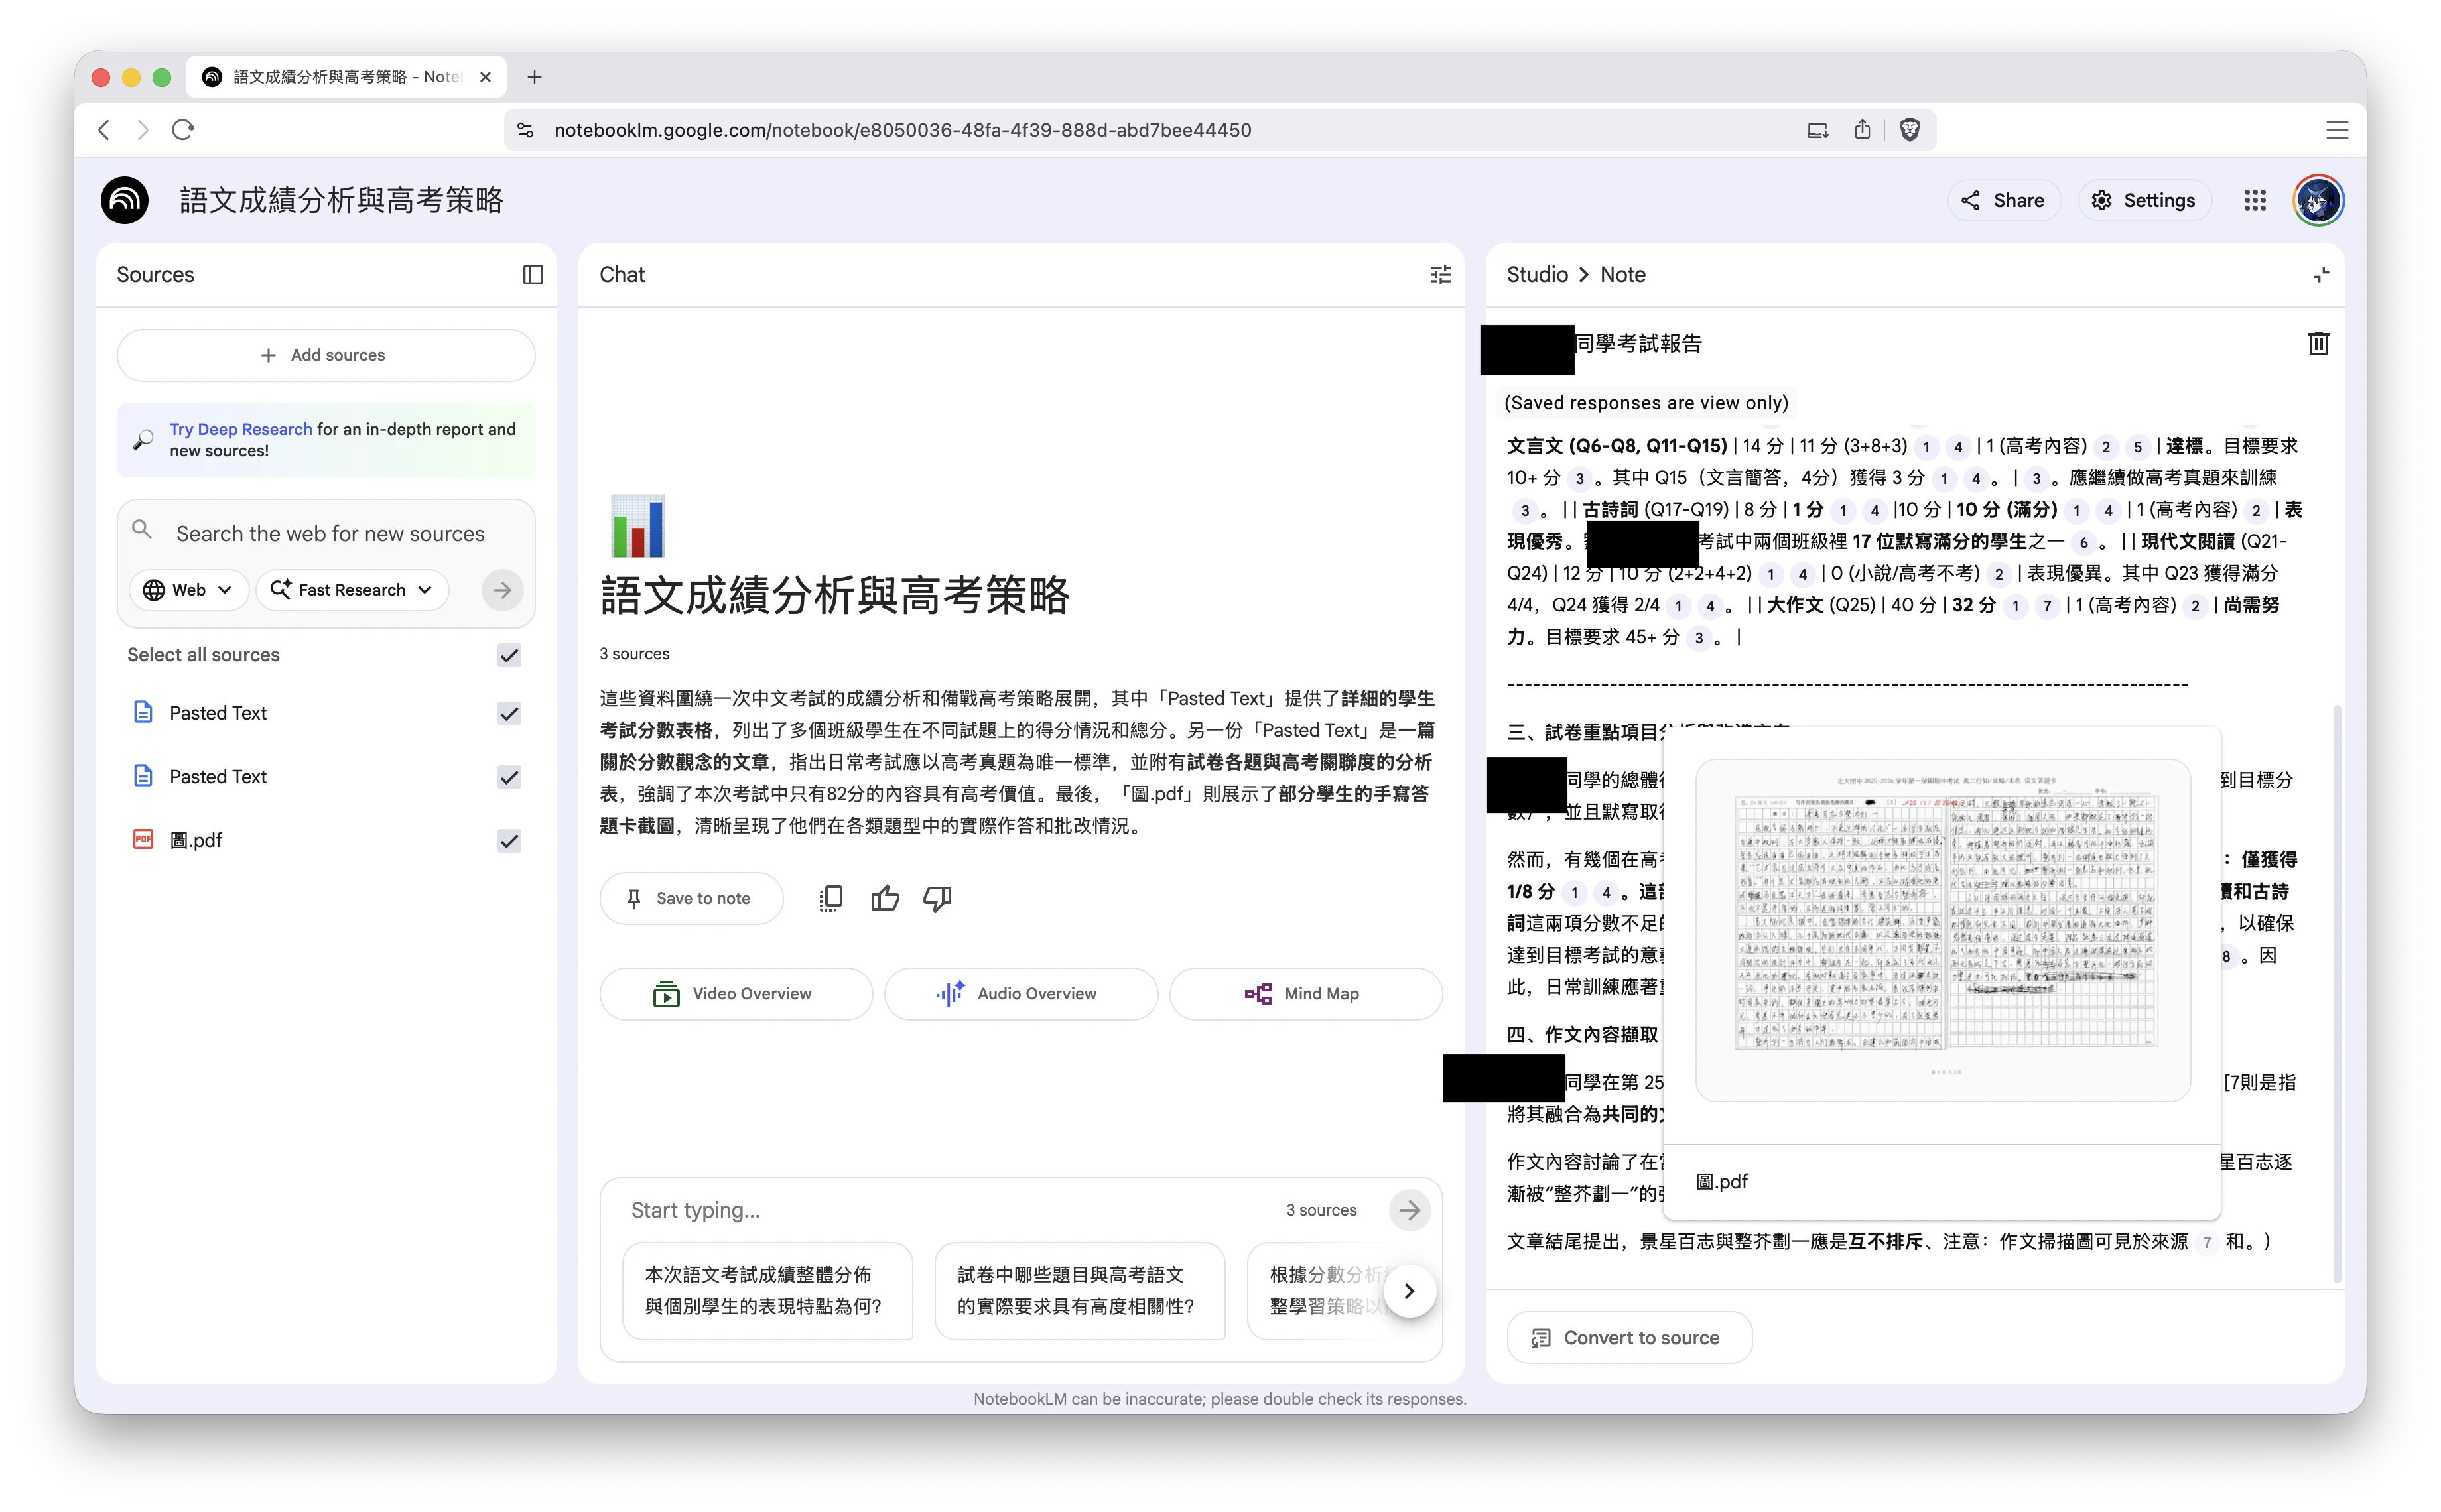
大面積的手寫識別實在還是災難,所以,也就用來看下文面,說下手寫用得到了。
手寫漢字這種落後玩意兒會消亡的,漢字手寫的識別,相信也會解決,畢竟要處理之前遺產;而考試不手寫的日子,繼續純期待吧。
引入這類閱卷和所謂成績報表乃至所謂 AI 的學校越多,教育的希望也自然越微茫;而教育信息化的牛皮也會越大而光鮮。
k12media exam image scraper manual
This document explains how to download all scanned answer sheet images for an exam from the legacy k12media system, using a small Python script that replays the same HTTP requests your browser sends.
The goal: a new admin, with no prior context, can follow this manual and successfully pull all images for a full grade/year.
1. Big picture
The exam image system is an early-2010s Java Web stack split over two domains:
- Main / reports:
https://test.k12media.cn - Image server:
https://yue.k12media.cn
On the student image report page you see:
- A class selector (e.g. “致知3班”, “格物3班”)
- A student list on the left
- A central carousel showing scanned pages (one student at a time)
- Hidden
<input>fields storing exam metadata:testId,subjectId,schoolId,testState, etc.
The browser does not load all students at once. For each selected student it:
- Submits a form to
ShowStudentImgsAction.a?findStudentImgsontest.k12media.cn. - That returns an HTML snippet containing several
<img>tags. - Each
<img>points toyue.k12media.cn/tqms_image_server/DemoAction.a?showImg&.... - The browser then fetches those image URLs and renders them in the carousel.
The Python script simply:
- Uses a class → student list API (DWR) to enumerate all students.
- For each student, calls the same
findStudentImgsendpoint. - Extracts the same
<img>srcURLs as the browser uses. - Downloads the actual image bytes from
yue.k12media.cn.
There is no “thumbnail” API in between. The script downloads exactly the same images the teacher sees in the page.
2. Site architecture & data flow
2.1 Domains & roles
https://test.k12media.cn
Login, main portal, and reports.
Hosts the student image report page.
Handles:- “Which students are in this class?”
- “Which image files belong to this student for this exam?”
https://yue.k12media.cn
Hosts the actual scanned image files under/tqms_image_server/DemoAction.a?showImg&....
Shares the same login session (cookies) with the main site.
You log in once in your browser. The Python script then reuses your browser cookies to talk to both domains.
2.2 Key endpoints
Exact query strings vary, but the structure is stable.
Student image report page (what you open in the browser):
texthttps://test.k12media.cn/tqms/report/ShowStudentImgsAction.a?method=showStudentImgReport&testId=<TEST_ID>&subjectId=<SUBJECT_ID>&schoolId=<SCHOOL_ID>&testState=<STATE>&...On this page you see:
- Top: exam summary
- Left: student list
- Middle: image carousel
- Several hidden
<input>s with metadata.
Student list by class (DWR):
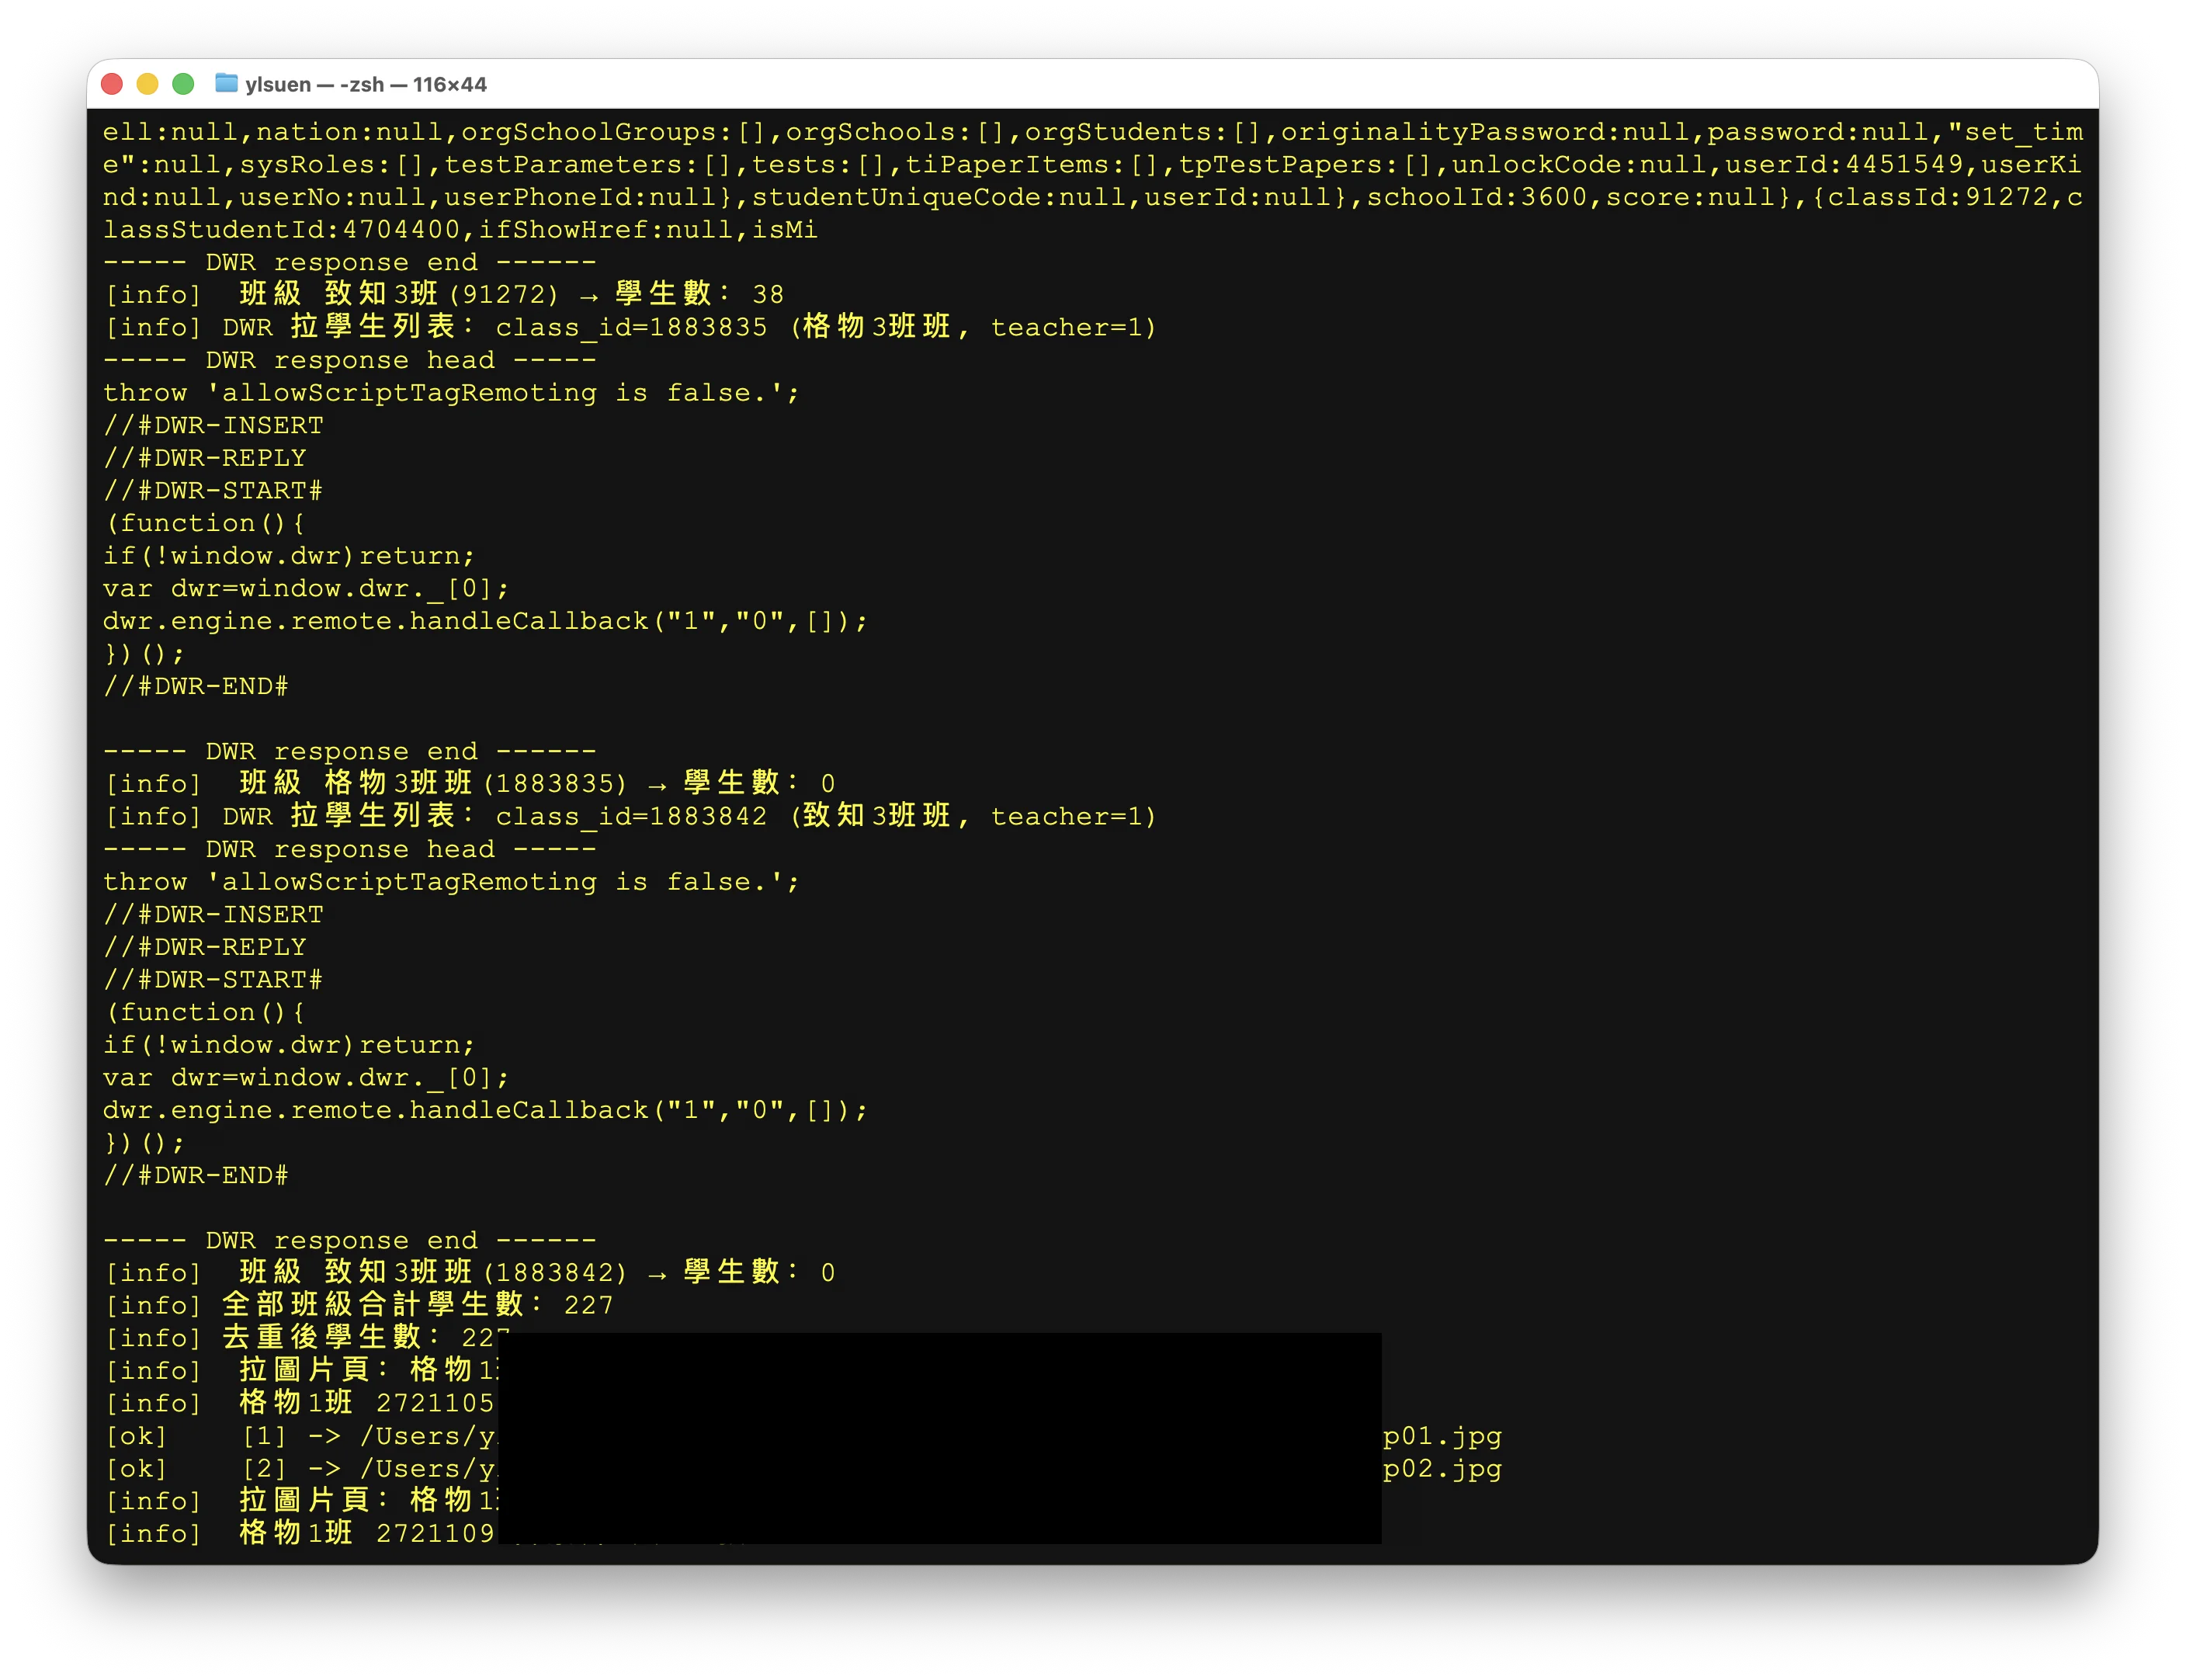
textPOST https://test.k12media.cn/tqms/dwr/call/plaincall/SelectSchoolUtil.findStudentListByClassId.dwrThe response is a JavaScript snippet that contains objects like:
jsdwr.engine.remote.handleCallback("1","0",[ { classId: 91268, noInClass: "2721101", orgUser: { name:"\u5F20\u4F55..." }, ... }, ... ]);The script parses
classId,noInClass, andnamefrom this.Student image list (
findStudentImgs):In this deployment, the image list is identified by student name + class + type of class, not by student number:
textPOST https://test.k12media.cn/tqms/report/ShowStudentImgsAction.a?findStudentImgsForm fields include:
schoolIdtestIdtestStatestudentNameclassIdisTeacherClass(0= administrative class,1= teaching group)subjectId
Response: HTML with several
<img>tags, e.g.:html<img src="/tqms_image_server/DemoAction.a?showImg&imgFliePath=...&imgFileName=...">Actual images:
textGET https://yue.k12media.cn/tqms_image_server/DemoAction.a?showImg&imgFliePath=<...>&imgFileName=<...>Headers:
Content-Type: image/jpeg(or sometimesimage/png)Content-Length: ...
These are the full-size page scans, exactly what the carousel shows.
2.3 Front-end behaviour
When you click a student in the left list:
A form is submitted to
ShowStudentImgsAction.a?findStudentImgswith:studentName= the label you clickedclassId= current classisTeacherClassdetermined by the page (administrative vs teaching class)- plus
testId,subjectId,schoolId,testState.
The server returns HTML that contains
<img src="...DemoAction.a?showImg...">for that student.The browser then issues GET requests to
yue.k12media.cn/tqms_image_server/DemoAction.a?showImg&...for each page and passes them into a jQuery FlexSlider carousel.
The script does the same thing, but loops over:
- every class in a configured list, and
- every student returned by DWR.
3. Packet capture: rediscovering things if they break
The system is old and unlikely to change radically, but if it does, you can always re-discover the APIs.
3.1 Tools
For this site, Chrome/Brave DevTools is enough; no need for full Wireshark.
Steps:
- Open the student image report page for the exam.
- Press
F12or⌥⌘I→ open Developer Tools. - Go to the Network tab.
- Enable “Preserve log” so navigation doesn’t clear the list.
3.2 Finding findStudentListByClassId
Filter by
dwrin the Network tab.Change class in the dropdown or reload the page with a specific class selected.
Look for:
text/tqms/dwr/call/plaincall/SelectSchoolUtil.findStudentListByClassId.dwrClick it. Under Request Payload you’ll see a body similar to:
textcallCount=1 nextReverseAjaxIndex=0 c0-scriptName=SelectSchoolUtil c0-methodName=findStudentListByClassId c0-id=0 c0-param0=string:<TEST_ID> c0-param1=string:<SCHOOL_ID> c0-param2=string:<CLASS_ID> c0-param3=string:<0 or 1> # isTeacherClass batchId=1 instanceId=0 page=/tqms/report/ShowStudentImgsAction.a scriptSessionId=<DWRSESSIONID>/<TIMESTAMP>This is exactly the body the Python script constructs.
In Response, you’ll see JavaScript representing the student list. The script parses out:
noInClass(class-internal student number)orgUser.name(student name)classId.
3.3 Finding findStudentImgs
With Network tab open, click a student on the left.
Filter by
findStudentImgs.Look for:
textPOST /tqms/report/ShowStudentImgsAction.a?findStudentImgsUnder Form Data you should see the parameters described above:
textschoolId: ... testId: ... testState: ... studentName: (Chinese name) classId: ... isTeacherClass: 0 or 1 subjectId: ...Under Response or Preview, you’ll see the small HTML snippet including:
html<img src="/tqms_image_server/DemoAction.a?showImg&imgFliePath=...&imgFileName=...">
The script calls this endpoint once per student and collects all such src values.
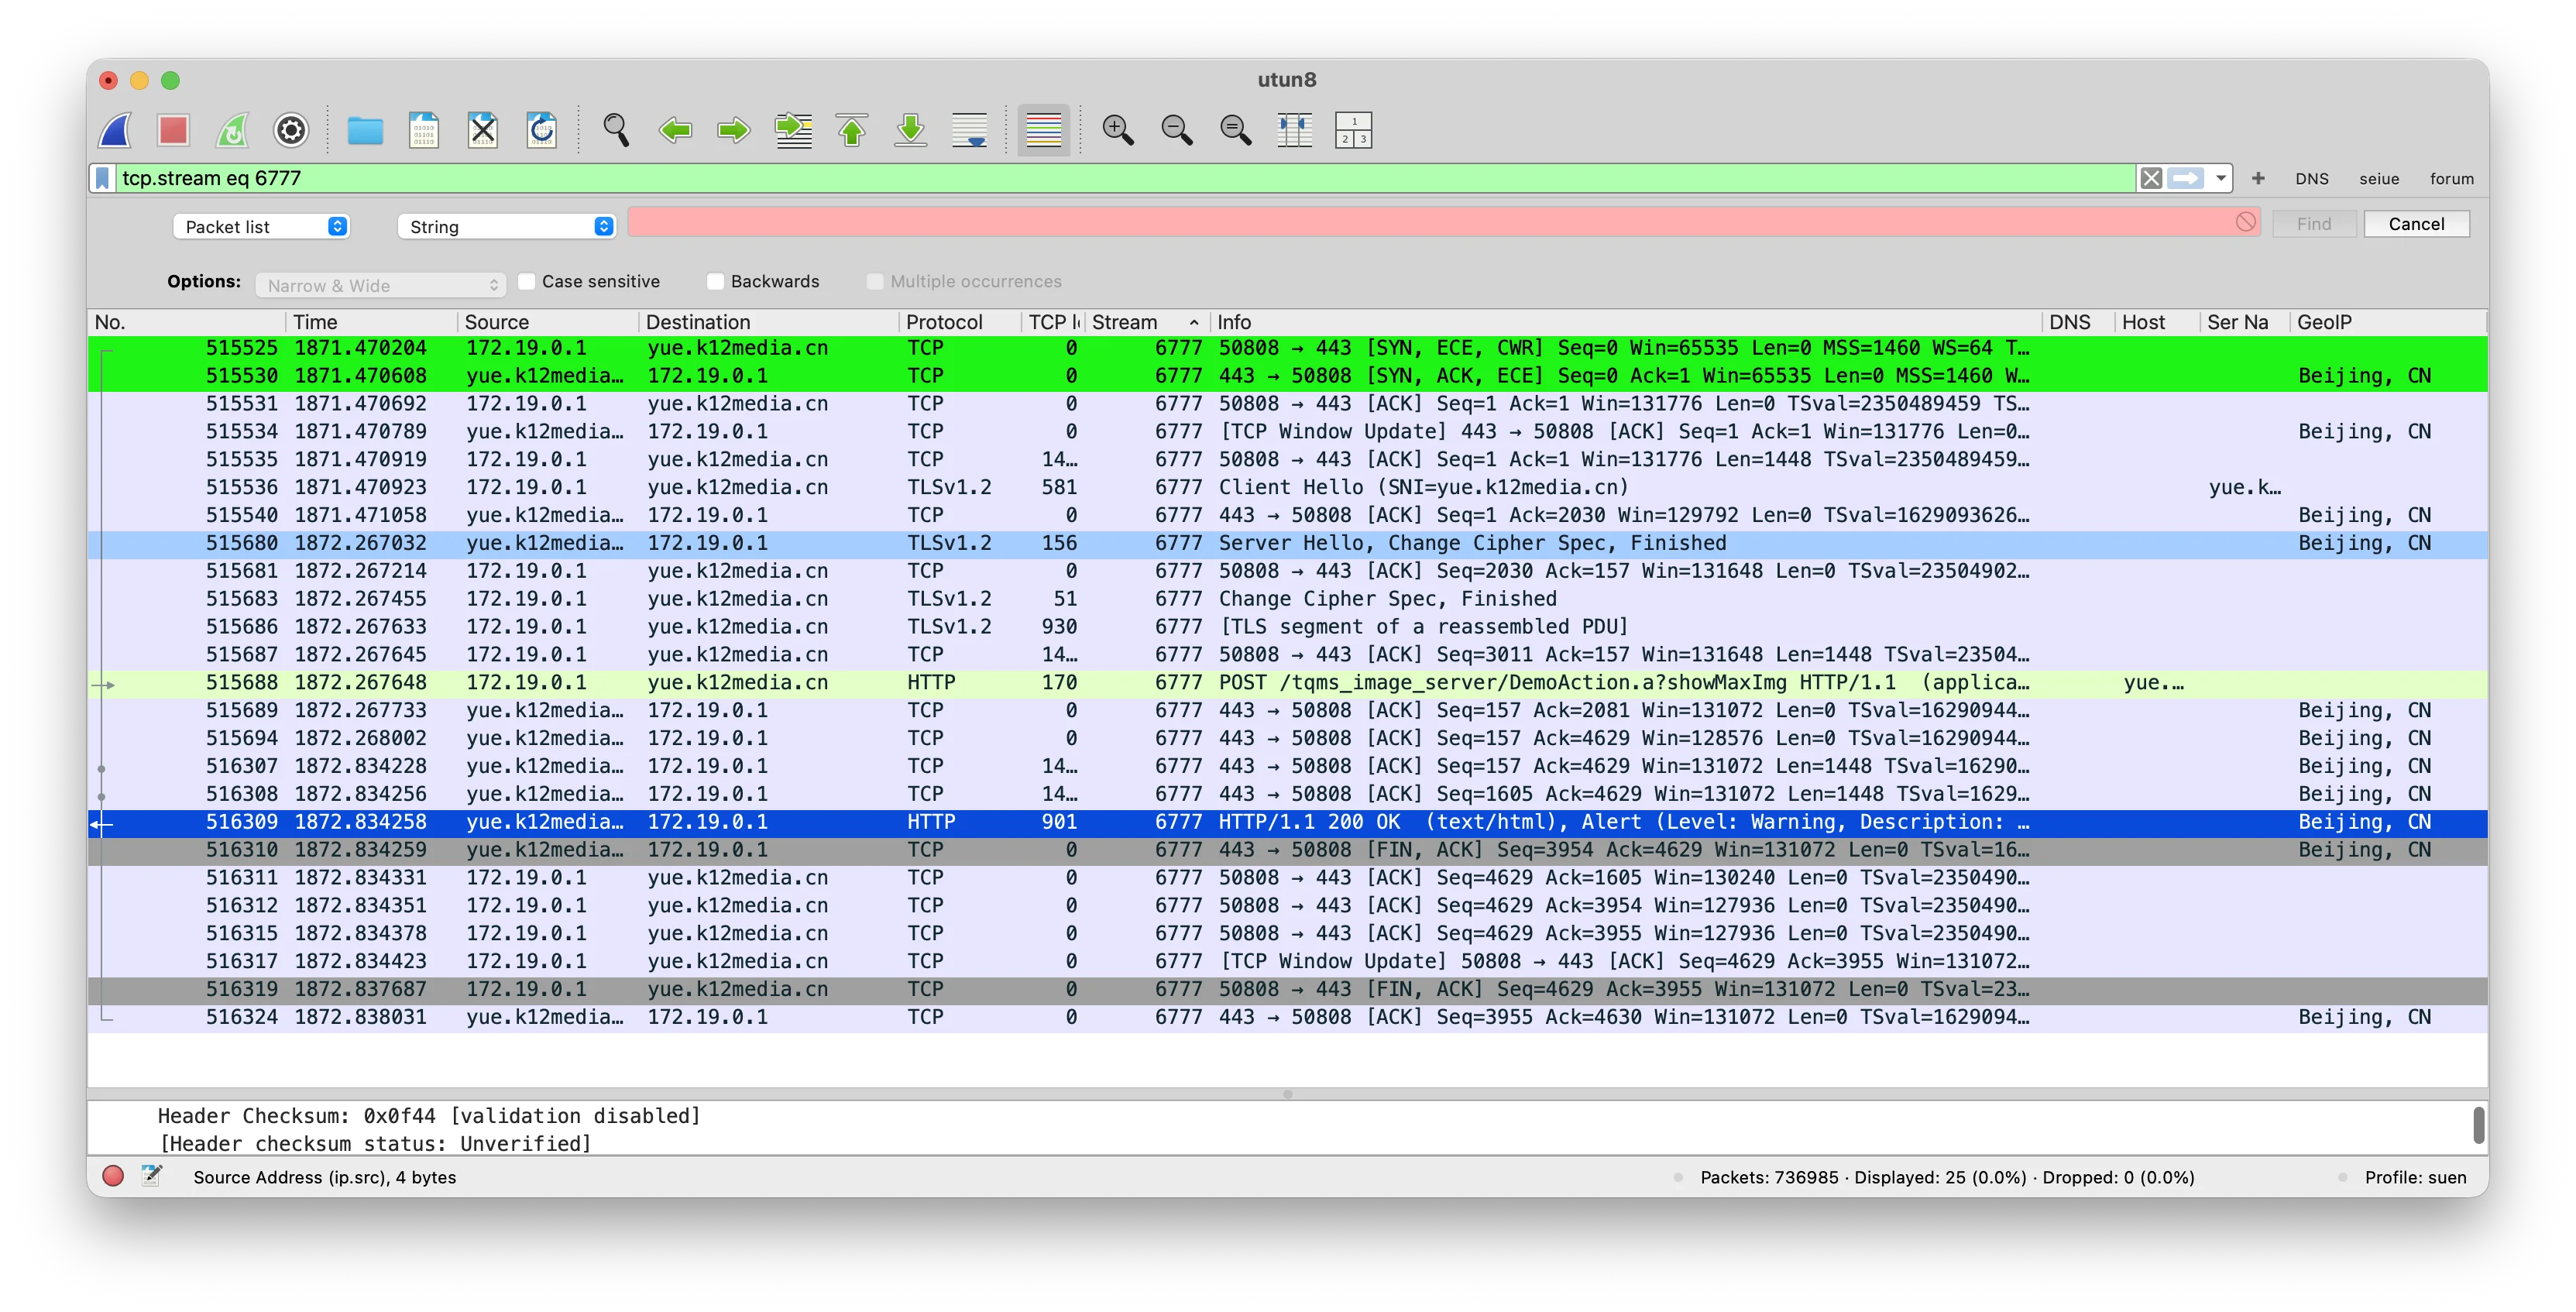
3.4 Finding the image URLs
Filter Network by
DemoAction.After you click a student, you’ll see several GET requests like:
textGET https://yue.k12media.cn/tqms_image_server/DemoAction.a?showImg&imgFliePath=...&imgFileName=...These URLs are exactly what the script downloads; there is no intermediate “thumbnail” version.
4. Credentials & constants you must copy
The script does not perform login. It relies on your browser session.
4.1 Session cookies RAW_COOKIE
Make sure you’re already logged in and can see the student image report page.
Open DevTools → Network.
Click any request to
https://test.k12media.cn.Under Request Headers, find the line:
textCookie: JSESSIONID=...; DWRSESSIONID=...; SERVERID=...; <possibly more>Copy the entire value (everything after
Cookie:) and paste it into the script:pythonRAW_COOKIE = ( "JSESSIONID=...; " "DWRSESSIONID=...; " "SERVERID=...; " "<other cookies if present>" )
When cookies expire (you start getting redirected to a login page), just repeat these steps and update RAW_COOKIE.
4.2 Exam metadata
On the student image report page:
View page source or use DevTools Elements panel.
Search for
testId,schoolId,subjectId,testState.You should see hidden
<input>s like:html<input type="hidden" id="testId" name="testId" value="119274"> <input type="hidden" id="schoolId" name="schoolId" value="3600"> <input type="hidden" id="testState" name="testState" value="1"> <input type="hidden" id="subjectId" name="subjectId" value="1">Copy these values into the script:
pythonTEST_ID = 119274 SCHOOL_ID = 3600 TEST_STATE = 1 SUBJECT_ID = 1
4.3 Class list
In this version, the script uses a small dataclass:
@dataclass
class ClassConfig:
    class_id: int
    is_teacher_class: bool  # False = administrative class, True = teaching class
    label: str

CLASSES: List[ClassConfig] = [
    ClassConfig(class_id=91266,   is_teacher_class=False, label="格物1班"),
    ClassConfig(class_id=91267,   is_teacher_class=False, label="格物2班"),
    ClassConfig(class_id=91270,   is_teacher_class=False, label="致知1班"),
    ClassConfig(class_id=91271,   is_teacher_class=False, label="致知2班"),
    ClassConfig(class_id=91268,   is_teacher_class=False, label="格物3班"),
    ClassConfig(class_id=91272,   is_teacher_class=False, label="致知3班"),
    ClassConfig(class_id=1883835, is_teacher_class=True,  label="格物3班班"),
    ClassConfig(class_id=1883842, is_teacher_class=True,  label="致知3班班"),
]
How to obtain class_id:
- On the report page, look for the
<select>for class, or - Watch Network when switching class; the URL or request body often contains the
classId.
If a new exam uses different classes, just adjust this list.
5. Python script behaviour
High-level phases:
Session setup
- Creates a
requests.Session(). - Sets
User-Agentto a realistic browser agent. - Parses
RAW_COOKIEinto separate cookies and attaches them.
- Creates a
Fetch all students for all classes (via DWR)
For each
ClassConfiginCLASSES:Build a DWR POST body:
textcallCount=1 nextReverseAjaxIndex=0 c0-scriptName=SelectSchoolUtil c0-methodName=findStudentListByClassId c0-id=0 c0-param0=string:<TEST_ID> c0-param1=string:<SCHOOL_ID> c0-param2=string:<CLASS_ID> c0-param3=string:<0 or 1> # isTeacherClass batchId=1 instanceId=0 page=/tqms/report/ShowStudentImgsAction.a scriptSessionId=<DWRSESSIONID>/<TIMESTAMP>POST it to:
texthttps://test.k12media.cn/tqms/dwr/call/plaincall/SelectSchoolUtil.findStudentListByClassId.dwrParse the response text with a regex to extract:
classIdnoInClassorgUser.name(decoded from\uXXXX)
Construct
Studentobjects with fields:class_idclass_labelis_teacher_classno_in_classname
Merge students from all classes into one list and de-duplicate by
(class_id, no_in_class, name).
For each student: fetch image HTML + image URLs
For each unique
Student:Build a student directory:
- Class folder:
<class_label>_<class_id>/ - Student folder:
<no_in_class>_<student_name>/
- Class folder:
POST to:
texthttps://test.k12media.cn/tqms/report/ShowStudentImgsAction.a?findStudentImgswith form data:
textschoolId = SCHOOL_ID testId = TEST_ID testState = TEST_STATE studentName = student.name classId = student.class_id isTeacherClass= 1 if student.is_teacher_class else 0 subjectId = SUBJECT_IDGet back the HTML and extract all
<img src="...">values whosesrccontainsDemoAction.a.
Download all images for that student
For each
srcextracted:If it’s relative, join with:
textIMG_SERVER_BASE = "https://yue.k12media.cn/tqms_image_server/"Send a GET with:
User-AgentheaderRefererset toShowStudentImgsAction.a?findStudentImgs
Read
Content-Typeto guess.jpg/.pngextension.Save the bytes as:
textp01.jpg, p02.jpg, ...Write a row to
index.csvwith:- Exam IDs
- Class info
- Student info
- Page index
- Relative local path
- Original
srcURL
Logging “missing” cases
- If the HTML for a student has no DemoAction images, the script logs a warning and writes that student into
missing.csvwith a reason (no_demoaction_imgor error message). - After finishing all students, the script prints total counts (students processed, images downloaded) and the paths of
index.csvandmissing.csv.
- If the HTML for a student has no DemoAction images, the script logs a warning and writes that student into
6. How to run it
Assuming you already have Python 3 and the requests library installed.
Log into k12media
- Open the browser, log in as usual.
- Navigate to the student image report page for the target exam.
Collect constants
- From page HTML:
TEST_ID,SCHOOL_ID,TEST_STATE,SUBJECT_ID.
- From class dropdown and/or Network:
class_idvalues and labels → fillCLASSES.
- From Network:
Cookieheader → paste intoRAW_COOKIE.
- From page HTML:
Choose an output directory
Decide where to store images, e.g.:
text/Users/yourname/Desktop/yue_imgsCreate the folder if it doesn’t exist.
Run the script
On macOS, for example:
bash/Users/ylsuen/.venv/bin/python3 /path/to/k12media_download_imgs.py /Users/ylsuen/Desktop/yue_imgs(Replace paths as needed on other systems.)
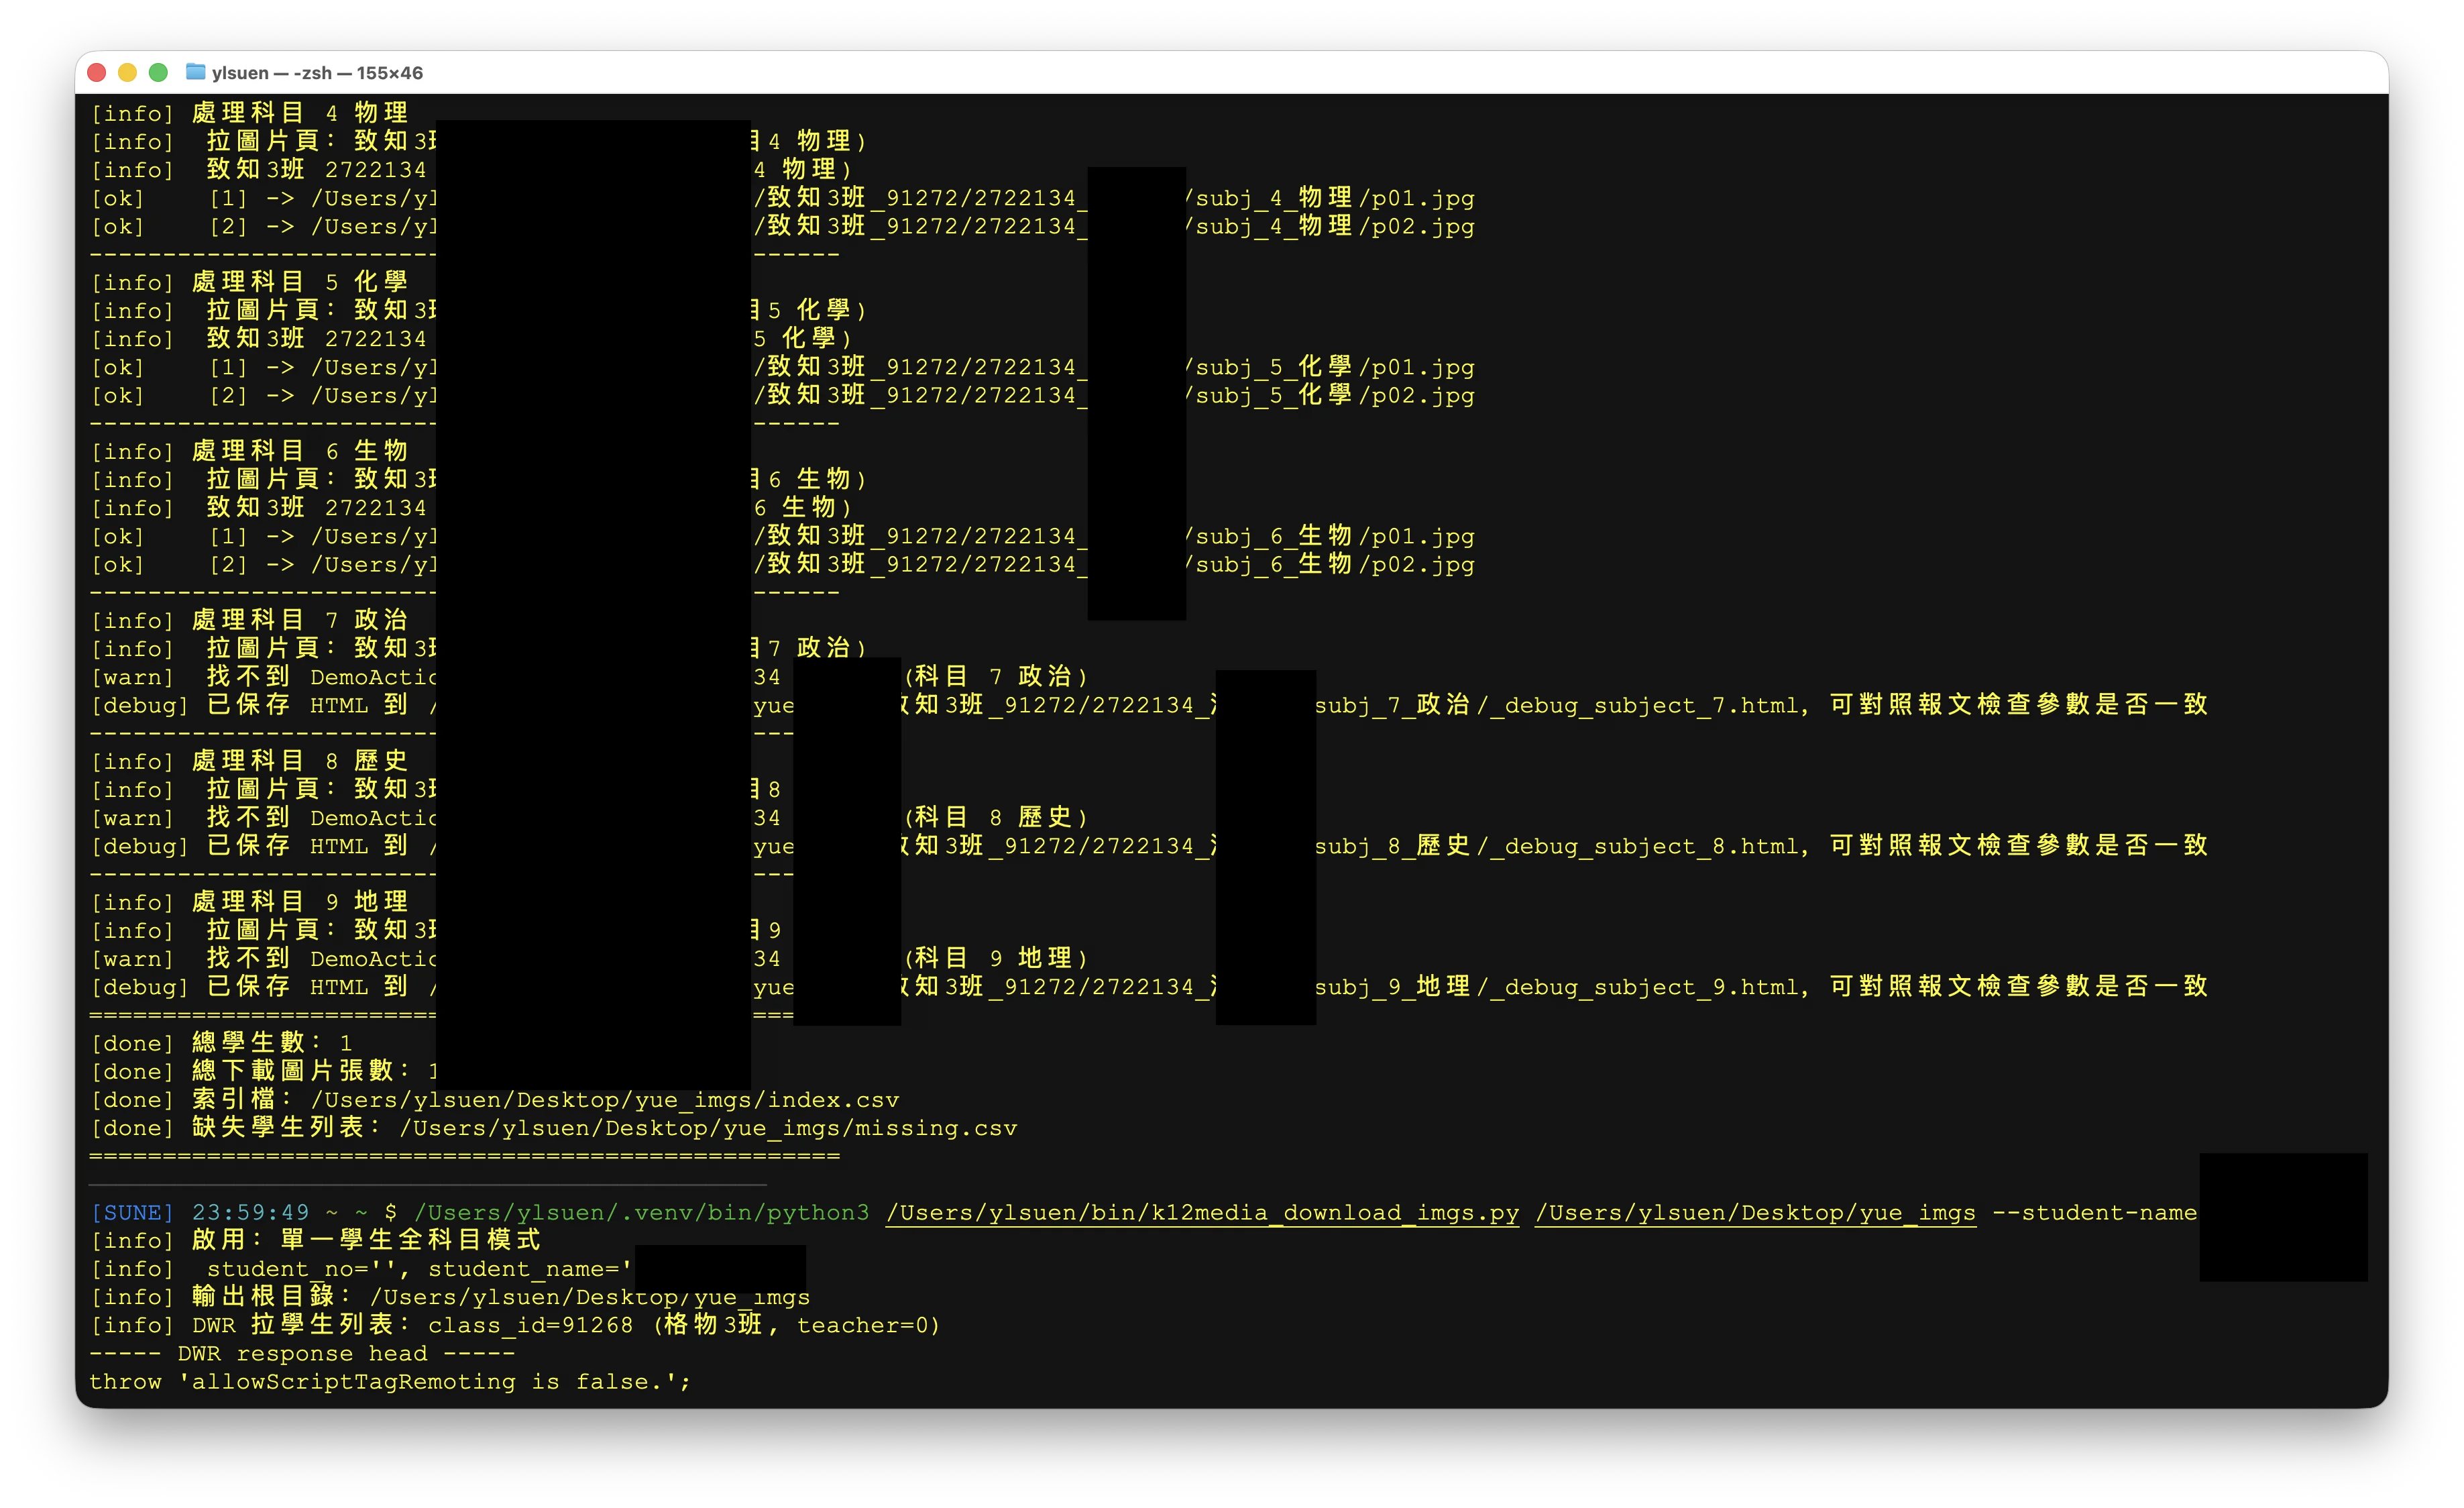
You should see logs like:
text[info] DWR 拉學生列表:class_id=91268 (格物3班, teacher=0) [info] 班級 格物3班(91268) → 學生數:XXX [info] 全部班級合計學生數:227 [info] 去重後學生數:227 [info] 拉圖片頁:致知3班 2722216 name [info] 致知3班 2722216 name 共 2 張 [ok] [1] -> /Users/.../致知3班_91272/2722216_name/p01.jpg [ok] [2] -> /Users/.../致知3班_91272/2722216_name/p02.jpg ...Inspect output
Folder layout:
textyue_imgs/ 格物3班_91268/ 2721227_name/ p01.jpg p02.jpg ... 致知3班_91272/ 2722216_name/ p01.jpg p02.jpg ... index.csv missing.csvYou can open any
p01.jpgin an image viewer to confirm resolution; these are the same full-size scans the browser uses.
7. When things break: common failure modes
Login expired / cookies invalid
- Symptoms: HTML of a login page instead of images; HTTP 302 to login.
- Fix: Re-copy
Cookiefrom a fresh logged-in browser session intoRAW_COOKIE.
DWR errors about
batchIdormethodName- Usually means the body format changed.
- Fix: Re-capture
SelectSchoolUtil.findStudentListByClassIdin DevTools and mirror the exact fields in the script.
findStudentImgsreturns “No images”- If UI also shows no images → student genuinely has no scanned script.
- If UI does show images → parameters in the script (especially
studentName,isTeacherClass) don’t match the UI; recapture from Network.
Images download as tiny thumbnails
- In this deployment, this does not happen:
showImgserves full pages. - If a future version adds
thumb=orsize=parameters, always copy the exact URL the carousel loads, not some separate thumbnail URL.
- In this deployment, this does not happen:
8. Summary
To download an entire exam’s answer sheets from this legacy k12media system:
- Use the browser to log in and open the student image report page.
- Extract exam constants (
testId,schoolId,subjectId,testState) from hidden inputs. - Build the
CLASSESlist from the class dropdown and/or captured requests. - Copy your browser
Cookieheader intoRAW_COOKIE. - Run
k12media_download_imgs.py <output_dir>. - Use the generated
index.csvand folder tree to confirm that every student’s pages are present.
The script does not “guess” anything magical: it strictly replays the same DWR + form + image requests that the report page uses, but does it for all classes and all students without you having to click through hundreds of names.
跑通了觀察班級編號,增增減減,順帶可以把全年級下載了⋯⋯
陳舊的網頁有陳舊的毛病⋯⋯
下午更新,加入單人全科圖下載模式: